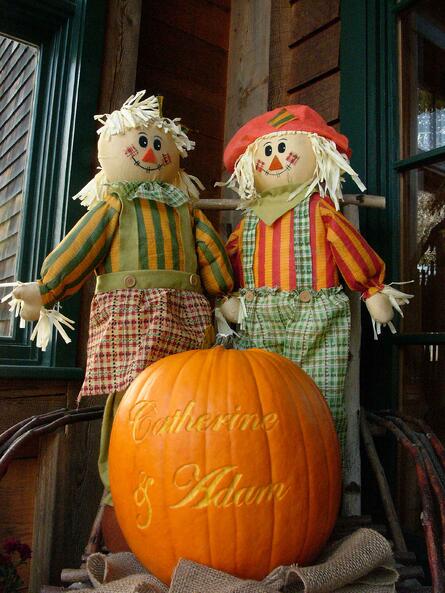
Project: Wedding is a series the Granite Ridge Estate & Barn Team has dedicated to DIY couples that want to have a very hands-on  wedding planning process. For those that make the time to do DIY projects for their big day, this series is for YOU! Weekly, we will be posting a How-To for a component for your wedding. From table numbers to shoes, we will cover it all!
Seeing as it is peak fall season here in Maine, there are pumpkins EVERYWHERE! And, why not? They are great to carve, paint, embellish and just have in their natural state. Pumpkins offer a variety of orange shades that can add so much beauty to your day and decor. This past week we participated in one of our very first styled photo shoots and I wanted to make something really special with the pumpkins. After looking online to find creative (and easy!) projects for the pumpkins, I decided on carving them.
To find out how I created these wonderful accents, follow the instructions below!
1. Prepare your work station.It was part of my training at The Culinary Institute of America, that you set up your work station before you  start anything. For pumpkin carving, put down some news paper for your work surface. Easy cleanup is always an appreciated factor in craft projects! Get your pumpkins out, set out your tools, ie chisel, knife, spoon, marker, etc., and have your designs ready if you are taping them on to trace. If you decide to trace your design the paper may become too messy and cut up to see after you are done tracing. Print a second copy of the design so that you can refer to it if needed.
2. Tape your designs onto pumpkin, or draw freehand.
Not everyone is artistically inclined. I would say I am creative but certainly not the best freehand artist. Because this project was done for a bridal photo shoot, I wanted it to be perfect... ok, ok, I have OCD and I needed it to be perfect.

3. Start carving!
I taped the design and numbers onto the pumpkins. I then used my paring knife to trace the design. I made sure to mark where the design has thicker lines, or delicate thin lines.
Use your tools, whether it is a chisel, knife, or spoon, but also remember to keep looking at it as you carve to make sure it maintains the look you want. Pumpkins are not perfectly round, so they will not necessarily be perfect for each design. You will have to adjust slightly.

4. Keep carving!
After about 5 pumpkins, you'll look at the stack of pumpkins you still have left. At that point you will either be really excited about carving pumpkins still, or you'll say, "What the heck was I thinking?" Hopefully the first, but in the possibility of becoming visually overwhelmed with the tast at hand, take a deep breath, Keep Calm and Carve On!
5. Clean up the carved area.
You can do this with an old toothbrush or a small paintbrush. You'll want to get the little pieces of pumpkin flesh off of the surface so that it doesn't draw bacteria.
6. Spray Pumpkin with bleach water solution.
The most important part of perserving your freshly cut pumpkins is to spray them with bleach water. This will keep the bacteria from growing, and will keep your pumpkin looking freshly carved for longer. Simply mix one part bleach with four parts water in a spray bottle. Put pumpkin in an area that is ok to have bleach around it and spray all over pumpkin, especially onto the freshly carved areas. Keep an eye on the pumpkins and spray with bleach water again if needed.
And there you have it! Beautiful pumpkin accents for your big day. To keep them super fresh looking, do them a few nights before your wedding and get your bridal party to jump in on the carving party!

 As always, Keep Calm and Plan On!


